Display a “Bought product” label in PrestaShop
In today’s tutorial we will learn how to add a “bought product” notification on the PrestaShop product page, much like Amazon does.
Creating a ProductController override in PrestaShop
The cleanest and standard compliant method for assigning the proper variables in PrestaShop, is to use a controller. We need to add content to the product page, so the one we are interested in is the ProductController. Additionally, in order to make sure our modification is upgrade-safe, we need to use an override instead of modifying the original.
Let’s get started!
Create a new file inside override/controllers/front/ and name it ProductController.php
Open it up, and within php tags add the following:
Class ProductController extends ProductControllerCore
{

}
We want to extend the initContent() method, so let’s do it:
Class ProductController extends ProductControllerCore
{
	public function initContent()
    {
        parent::initContent();
    }
}
We are calling the parent’s initContent as well, to make sure all the needed variables are loaded. At this point, before the parent is called, let’s first check if the current user is a registered customer, as we will never be able to tell what a guest has bought:
Class ProductController extends ProductControllerCore
{
	public function initContent()
    {

    	if($this->context->customer->id) // only if logged in
        {
			$bought_products = $this->context->customer->getBoughtProducts(); // only valid orders
        }
        parent::initContent();
    }
}
If it is, we get all the products he bought. Please notice only valid(paid) orders are considered. If you wish to include them all, you must remove the condition “valid = 1″ in the getBoughtProducts method, Customer class.
Now let’s cycle through them. If the current product’s id is matched, we assign a date variable to the template:
    if($this->context->customer->id) // only if logged in
    {
        $bought_products = $this->context->customer->getBoughtProducts(); // only valid orders
        if($bought_products)
        {
            foreach ($bought_products as $prod) {

                if($prod['product_id'] = $this->product->id)
                {
                    $this->context->smarty->assign(array(
                        'bought_on'=> $prod['date_add']
                    ));
                }
            }
        }
    }
We are done with php, the next step will be showing our custom text in the product.tpl file. Before proceeding, make sure to erase your class_index.php file, located in the cache/ folder.
Adding a bought product text to the product page
Open up product.tpl, located in the theme folder. Please notice your code will be different if you use a custom template, as I am using default-bootstrap for this demonstration. I decided to add the info box at the top of the page, above the product image.
If you want to pick the same spot, locate the div with class pb-left-column, and add the following right before it:
		{if isset($bought_on)}
			<div class="col-xs-12">
				<div class="bought_on alert alert-info">
					{l s='You purchased this product on'} {dateFormat date=$bought_on}
				</div>
			</div>
		{/if}
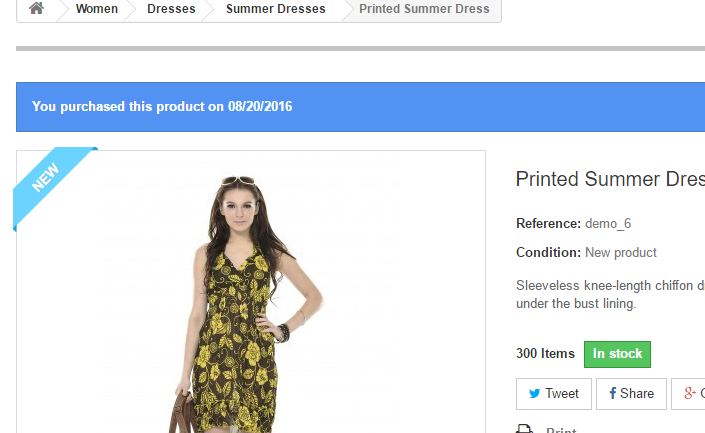
Save and refresh, we are done! You should see something like this: